Chocolate Banana Pudding Recipe

If you’re looking for a dessert that’s both rich in flavor and easy to make, chocolate banana pudding is where it’s at. There’s just something about the creamy combination of chocolate pudding and bananas that makes your taste buds dance.
Trust me, once you try it, you’ll want to make it for every family gathering, potluck, or weekend treat.
This pudding is fun-to-make recipe. Whether you’re a beginner in the kitchen or have been baking for years, you’ll love how simple and quick it is to whip up.
What is Chocolate Banana Pudding?

Chocolate banana pudding is a fun twist on the classic Southern dessert that people have loved for years. Normally, banana pudding uses vanilla pudding, but this version swaps it for rich chocolate pudding to make it even more delicious.
With sweet banana slices and crunchy vanilla wafers, this dessert is creamy, crispy, and full of comforting flavors.
It’s a favorite at family get-togethers, potlucks, and holiday dinners because it’s easy to prepare ahead of time and serves a lot of people. The chocolate gives it a richer, more indulgent taste, making it perfect for anyone who loves chocolate..
Why You’ll Love This Chocolate Banana Pudding Recipe
There’s so much to love about this recipe! First off, it’s super easy to make. You don’t have to be a pastry chef to pull off this dessert—if you can layer pudding, bananas, and wafers, you’re already halfway there.
Plus, the combination of chocolate and banana is a winner. It’s rich, indulgent, and hits all the right notes.
Even if you’re someone who typically sticks to the classic version, this chocolate twist will win you over. It’s a fun and delicious way to change things up.
Essential Ingredients for Chocolate Banana Pudding
- Bananas: Choose bananas that are ripe but still firm. They should be sweet but not mushy, as they need to hold up during the layering process.
- Chocolate pudding: You can use either homemade chocolate pudding or a quick instant mix. Either way, the chocolate flavor is the star of the show, so don’t skimp on it!
- Vanilla wafers: These give the pudding that classic crunch. You can also try chocolate wafers or graham crackers if you want to mix things up.
- Whipped cream: You can either whip up some fresh cream or use store-bought. It adds a light, airy texture to the dessert.
- Optional extras: Try adding cocoa powder or chocolate chips to up the chocolate factor.
Step-by-Step Instructions
Step 1: Prepare Your Chocolate Pudding
You can either make your chocolate pudding from scratch or use an instant mix. If you’re making it from scratch, whisk together sugar, cocoa powder, cornstarch, and milk until the mixture thickens into a creamy pudding.
This usually takes about 10 minutes of simmering on the stove. For instant pudding, just whisk with cold milk and let it set for a few minutes.
Step 2: Layering Bananas and Wafers
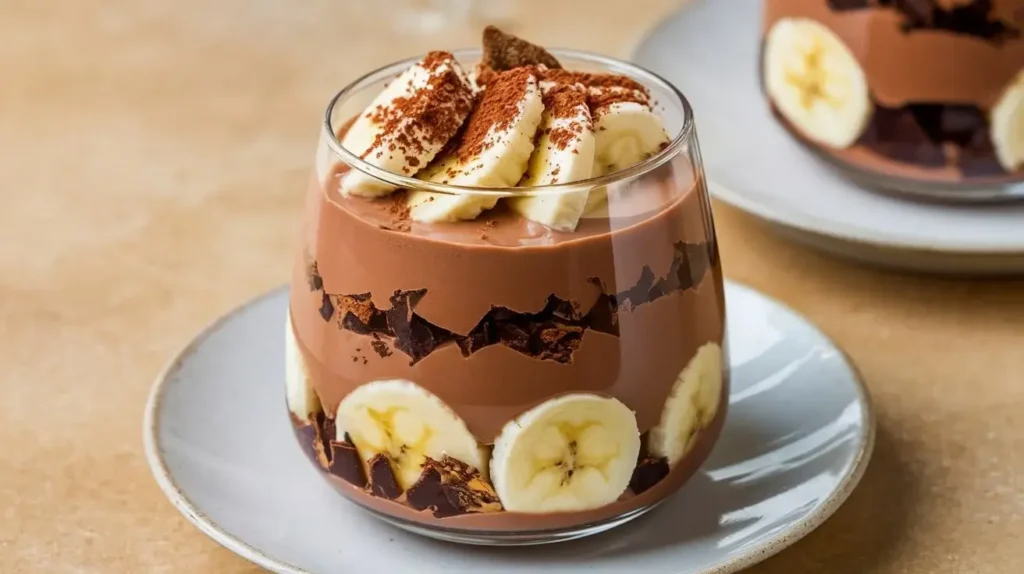
Slice your bananas evenly—this ensures that every bite has the right ratio of banana to pudding. Start by adding a layer of vanilla wafers to the bottom of your dish, then a layer of pudding, followed by banana slices.
Step 3: Assembling Your Chocolate Banana Pudding
Continue layering until your dish is full, making sure the top layer is pudding. You can get creative here—make individual servings in cups, or assemble the whole thing in a large trifle dish for a more dramatic presentation.
Step 4: Chill and Serve
Let the pudding chill in the fridge for at least 2 hours before serving. This allows the flavors to meld together. When you’re ready to serve, add a dollop of whipped cream on top and garnish with chocolate shavings or even some extra banana slices for that wow factor.
Tips for Layering Bananas and Pudding Perfectly
When it comes to banana pudding, the key to making it look and taste amazing is in the layering. The bananas need to be sliced just right—if they’re too thick, they dominate the bite, but if they’re too thin, they get lost in the pudding.
Aim for even slices about a quarter-inch thick. This way, each spoonful will have the perfect balance of chocolate, banana, and crunchy wafers.
Speaking of wafers, they add a crucial texture contrast. But, nobody wants soggy wafers. To prevent this, layer them between the pudding and bananas so they absorb just enough moisture to soften up but still have a slight crunch.
And here’s a pro tip: Chill the pudding for at least two hours before serving. This will give the layers time to settle and blend, making each bite perfectly creamy.
Ingredient Variations and How to Customize the Recipe
One of the coolest things about this recipe is how easily you can make it your own. Whether you’re looking to switch up the flavors or make a healthier version, there are plenty of ways to get creative. Here are a few variations that will elevate your chocolate banana pudding game:
- Vegan Chocolate Banana Pudding: Swap out the regular milk with almond or oat milk and use vegan chocolate pudding mix. You can also replace the whipped cream with a coconut cream alternative and choose vegan-friendly wafers. It’s a delicious, dairy-free alternative.
- Gluten-Free Option: If you’re avoiding gluten, look for gluten-free vanilla wafers or cookies. Also, check the label on your chocolate pudding mix to make sure it’s gluten-free—many store-bought versions are, but it’s always good to double-check.
- Adding Extra Flavors: Feeling adventurous? Try swirling in some peanut butter to the chocolate pudding for a rich, nutty twist. Or, drizzle caramel sauce between layers for added sweetness and depth. Trust me, caramel and bananas are a match made in heaven!
Frequently Asked Questions

Hello this is Naveed – the creator of BananaPuddingRecipe.com and a passionate dessert lover. Specializing in banana pudding, I share easy, creative recipes that put a fresh spin on this classic dessert. With a strong love for food and careful research, I make sure my recipes are both delicious and reliable. When not in the kitchen, I enjoy connecting with readers and keeping up with the latest dessert trends.
